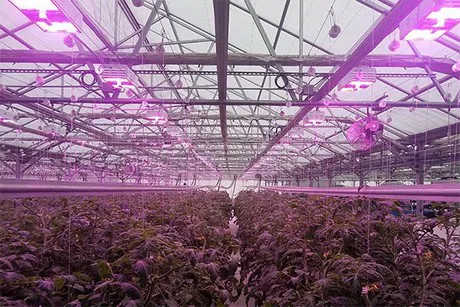
Ever had a question about your crop that no one seemed to have the answer to? Sometimes the most efficient way to answer the question is to run an in-house horticultural lighting trial.
Why run a horticultural lighting trial?
In-house grow light trials allow you to get results that reflect your site-specific conditions, focus on answering your specific questions and improve your operation’s efficiencies faster.
Light spectrum, photoperiod and intensity can be custom-tailored to your specific crop cultivar or environment. Additionally, you may want to trial a new technology. Benefits that can come with adjusting your lighting strategy include improvements for:
- Fruiting
- Flowering yield
- Rate of growth
- Fresh weight
- Compactness
- Root development
- Plant health
- Color
- Flavor
- Nutrition
Here’s a step-by-step guide for setting up your lighting trial to get you the most meaningful results.
Start Planning
Before you get going, get organized with the steps below.
1. Determine what you’re trying to learn
Identify what crop you’re working on and what question you’re asking. This will help you design your trial to give you specific information to answer that question.
Write it down! This will be the start of your trial planning and the basis for your trial design.
2. Establish your control area
Set aside an area of your production that will remain unchanged and capture the details of this area in your trial documentation. This area will act as the control for your trial and allow you to objectively evaluate your trial’s behavior.
It’s important that your control area is as representative of your production areas as possible!
3. Design your trial area
Set aside another area of your production to use for your trial. Ideally, this area will have similar environmental and physical conditions to your control area and allow you to change the lighting without affecting the lighting in your control area.
4. Define measurements
Decide which plant measurements are relevant to answering your trial question. You also need to choose an interval to take those measurements at. Choose an interval that makes sense for your crop’s growth cycle so that you can track changes and have data to refer to when you evaluate your trial.
Record Your Data
Now that you’re ready for a successful lighting trial, make sure to track your data.
5. Record starting details
Include crop traits that relate to your trial question in your trial documentation. Enter all the starting data for both the control and trial areas and continue recording the data regularly until the trial is complete.
6. Start your trial
Begin your trial at the beginning of the week and with a full day (rather than starting midday) for both your trial and control areas. This will allow for easier data analysis and allow for troubleshooting and handling of unexpected behaviors that might come up over the weekend.
7. Record data
Record your trial data at regular intervals. Include any observations about the trial and control areas that you notice so that you can consider those in your final analysis.
Analysis & Evaluation
Now that you have your data handy, it’s time to dig in and harvest any learnings!
8. Identify inconsistencies
Review the data from your control and trial areas. Do you see inconsistencies between the environmental (ex: temperature) or production details (ex: fertility) in your control and trial areas that make the results hard to compare?
Identify inconsistencies and determine how they affect your results. If you didn’t observe inconsistencies between your control and trial areas, you can feel confident that the data shows results based on your trial treatment.
9. Clarify results
What does the data from your trial and control areas tell you about your trial question? Ideally, you will have minimal environmental and production inconsistencies between your trial and control areas and the data shows differences in your trial variable.
You can feel confident that the difference is the result of your trial treatment. These differences can help you answer your trial question.
10. Summarize your results
Summarize your recorded data, observations and results to determine whether you would like to answer additional questions or are confident enough to build a production protocol based on your first trial’s results.
11. Roll out your new customized lighting strategy
If you feel good about your results, you can now move your trial protocol over to production, and begin reaping the benefits of custom-tailored lighting recipes.
For more information:
LumiGrow
(800) 514-0487
lumigrow.com